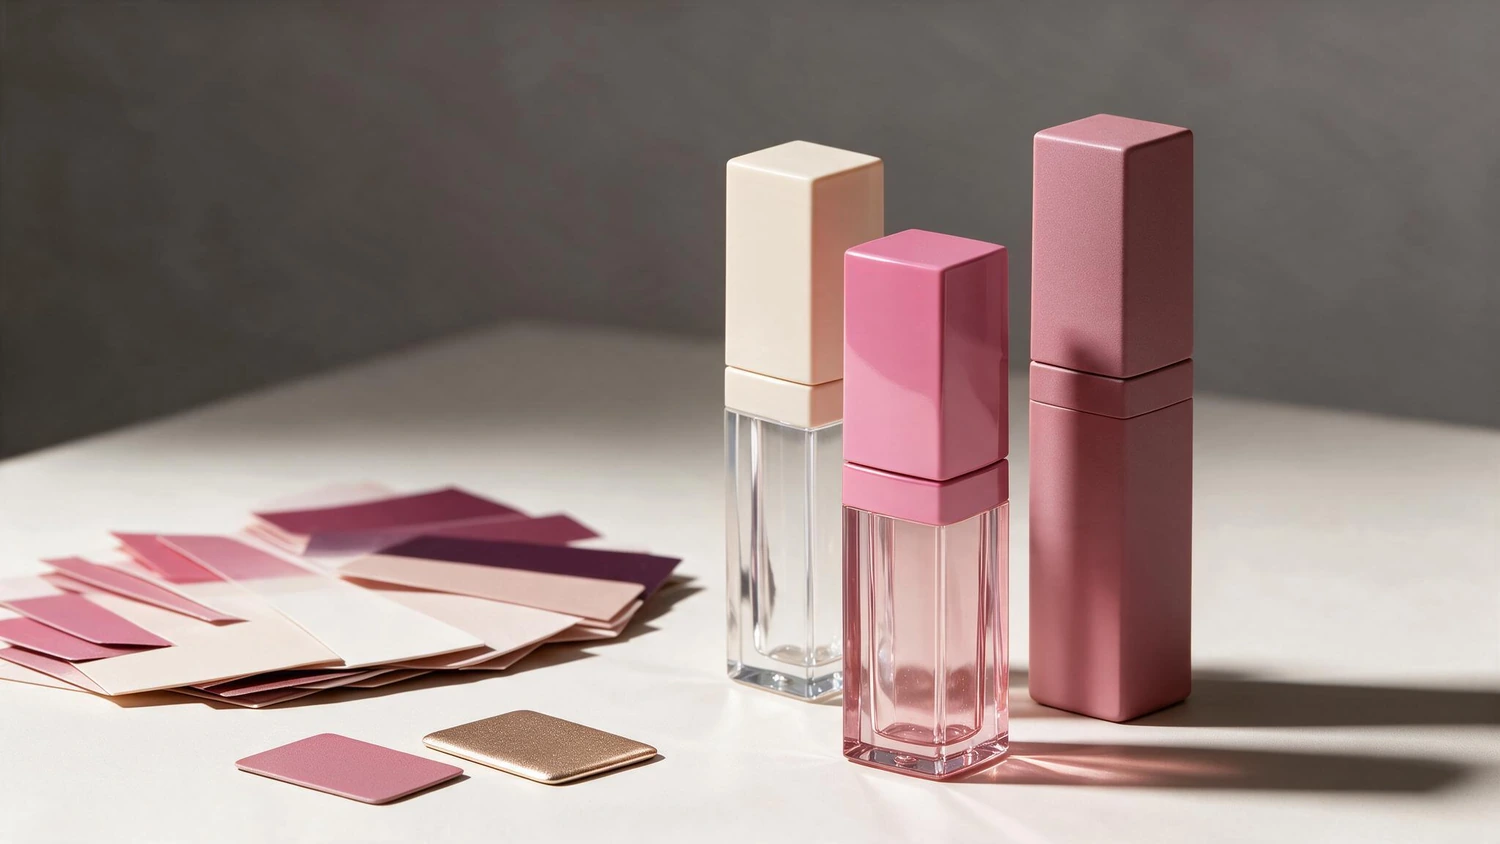
Once you have chosen a lip gloss tube, how do you give it your brand’s look? For packaging developers and designers, specifying pink is not enough: transparent pink, opaque solid pink, and glossy or matte versions of the same shade create different appearances. The cap color, text, and graphics complete the design.
Sambound’s packaging services include product design, mold development, molding, surface finishing, and assembly. An appearance design needs to connect these stages: color can come from coloring the plastic, gloss or matte effects can be formed by the mold surface, and graphics can be added to selected areas after molding.
Specify Body and Cap Colors, Transparency, and Opacity
First, consider where the color goes. On an empty tube, for example, a transparent body paired with an opaque cap still lets you see the applicator rod through the wall. Making the body opaque as well creates a more continuous block of color. The cap can match the body or use another color for contrast.
The shade and the ability to see through the part are separate specifications. A pale pink can be transparent or hide what is inside. Two tubes with similar colors may have different levels of transparency.
Plastic parts can get their color in different ways. For an injection-molded part, colorant can be mixed with the plastic resin before it is molded into a colored part. Color masterbatch, for example, is a concentrated colorant in pellet form; it is not the only way to color the plastic itself. Spray painting applies paint to a part after molding, creating a colored coating on its surface.
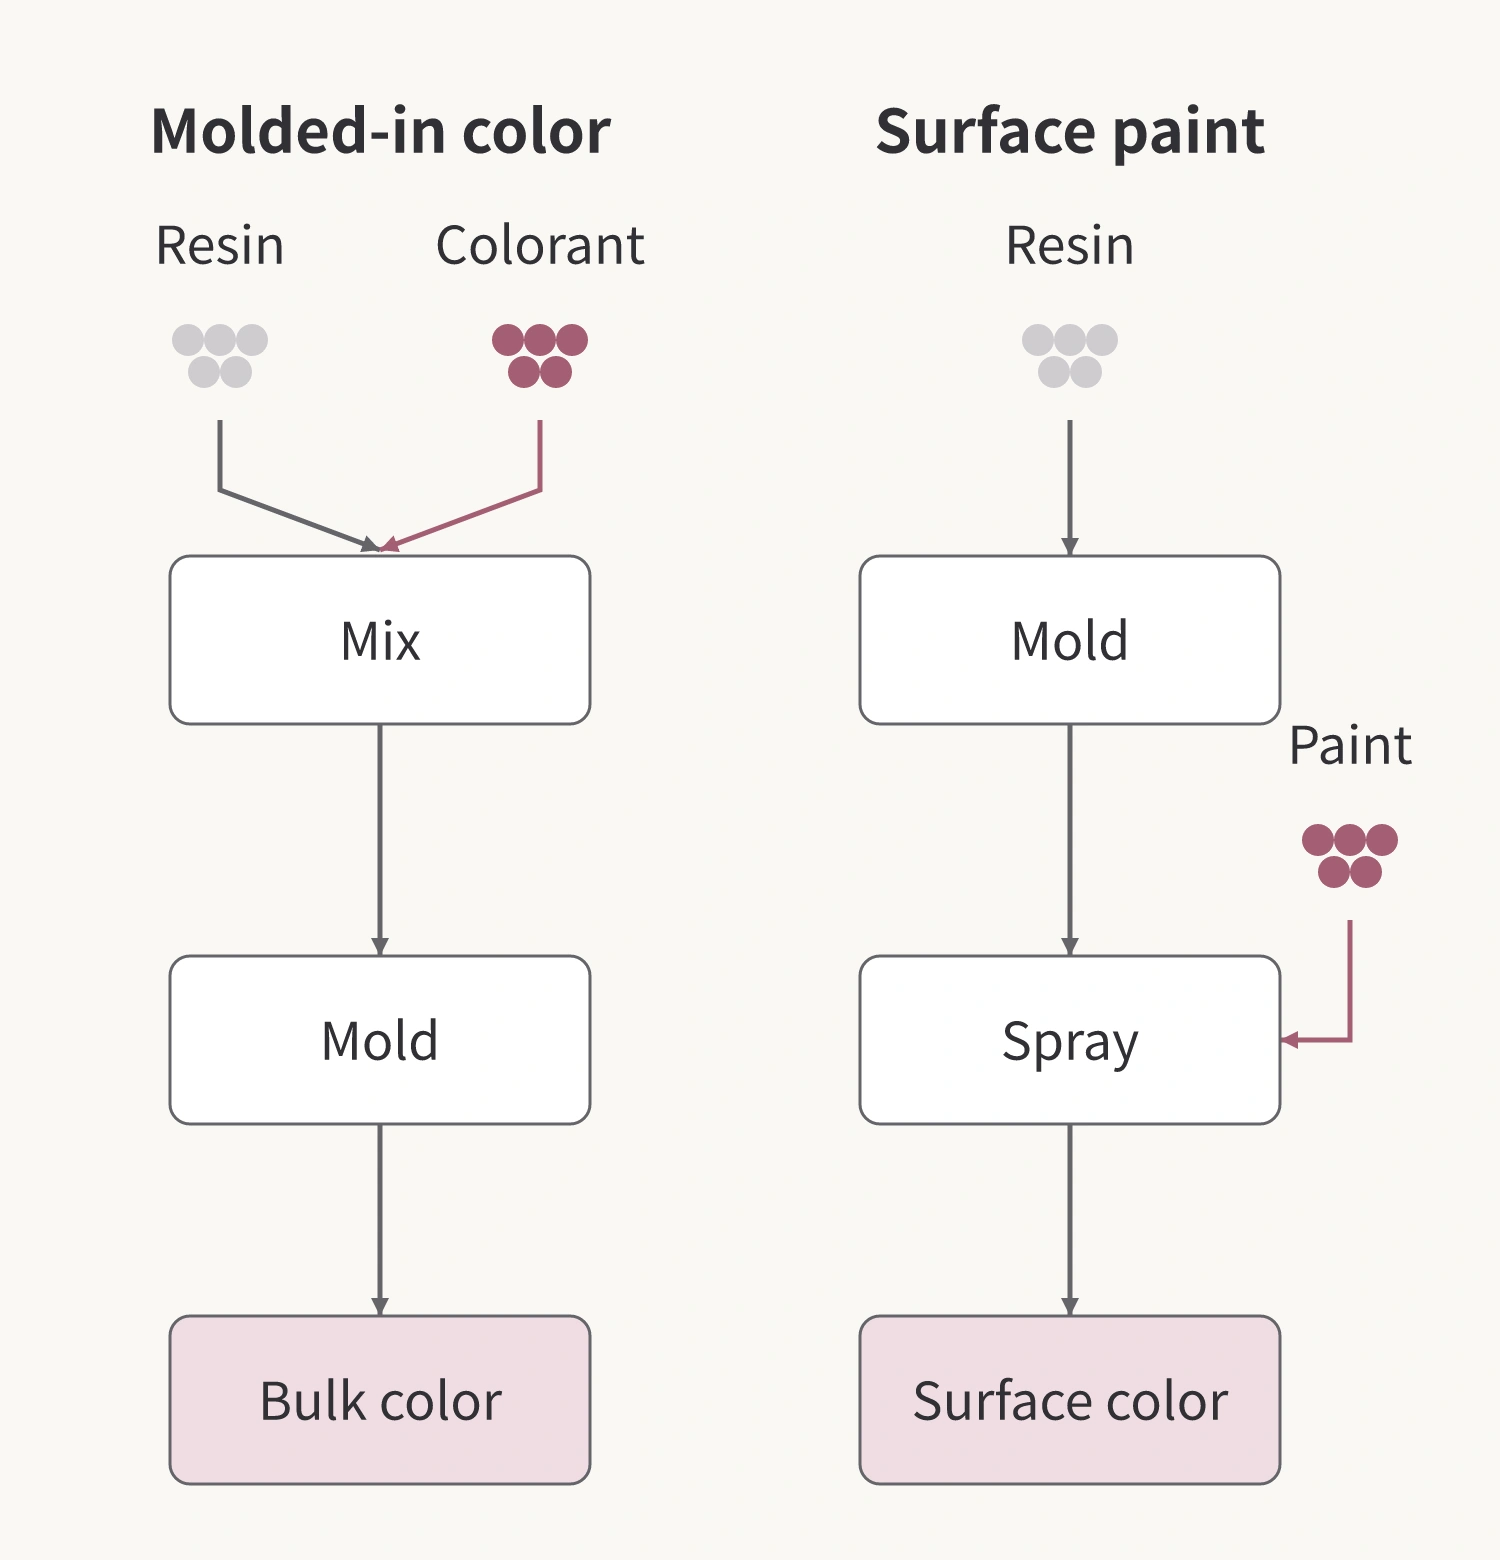
The two methods put color in different places. A pink appearance alone does not tell you whether the color is within the plastic or in a coating on its surface. Start by specifying a transparent, translucent, or opaque appearance, then determine the method based on the material of the particular part.
Even when the body and cap are intended to match in color, each needs separate color matching. Resin type and surface condition affect the finished appearance. A color code defines the target; the result needs to be viewed on the complete parts.
How Glossy, Matte, and Metallic Effects Are Created
Once the shade is set, reflection can also be changed. Glossy and matte surfaces look different even in similar colors. The following design illustration uses the outer shape of Sambound’s YR7070B: the four caps remain the same, while only the bodies change.
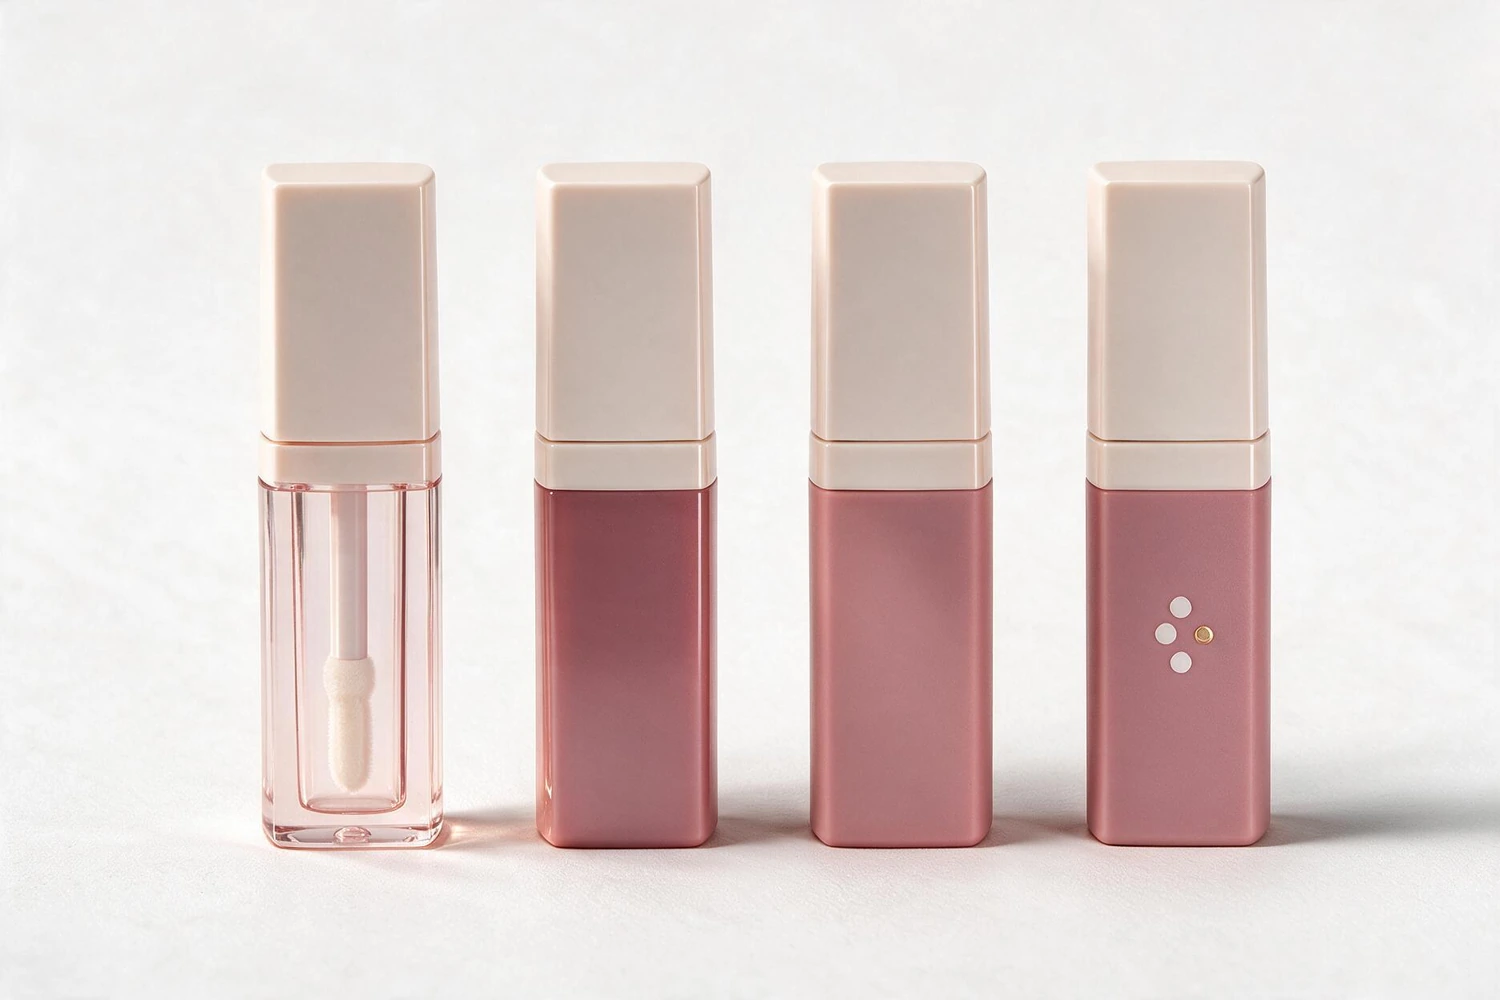
Gloss and matte effects can be formed during molding. A smooth, polished mold surface can produce a glossy finish, for example, while a mold surface treated by stoning or sandblasting can produce a more matte appearance. The material also affects how the surface finish is reproduced.
Coatings applied after molding can also create glossy or matte finishes. A request for a matte finish therefore needs to specify the method: will the mold surface be adjusted to give the molded part the desired appearance, or will a surface treatment be added after molding? The first approach itself involves mold work. Appearance customization does not always consist solely of processing finished parts.
A metallic appearance is another effect. Surface treatments such as electroplating and vacuum metallization by evaporation can give plastic parts a metallic appearance; some colorant formulations can also create metallic effects. A silver or gold reflection does not establish that the entire cap is made of metal, and a photo alone cannot identify the process.
Add Logos and Graphics to the Selected Surface
The base color and gloss define the appearance of a large area, while text, logos, and graphics may occupy only a small part of it. The geometric decoration on the right of the illustration above changes this local visual emphasis.
Screen printing and pad printing use ink to form text and graphics. In hot stamping, a heated die or roller applies pressure to transfer the decorative layer from a foil to the selected surface. The carrier is then peeled away, leaving the text, logo, or other design. Heating conditions need to be confirmed for the chosen foil, substrate, and any existing coating. A suitable metallic-effect foil can provide local metallic accents; it serves a different visual purpose from metallizing an entire surface.
These graphics can be combined with the base color and finish, such as contrasting text on an opaque body or local highlights on a matte surface. However, the artwork needs to be assessed on the actual part. Flat faces, curved surfaces, and corners have different processing conditions, so a flat design layout cannot be treated as the complete printable area.
Consider what surface the ink or decorative layer actually contacts. Printing directly onto plastic is different from printing over an existing coating because the underlying surface has changed. Some plastics also require suitable pretreatment. Surface contamination can separate the ink from the substrate and cause adhesion problems. The proposed graphics should therefore be trialed on the chosen part and surface combination to check their appearance and adhesion.
Changes to the Outer Shape Require Part and Mold Assessment
Changing a round tube to a square one, or making a cap longer, changes the geometry of the part. During injection molding, plastic enters the mold cavity and takes on the cavity’s shape as it solidifies. A change to the outer profile therefore requires assessment of the affected parts and molds; it cannot be treated like a color change.
A flat logo printed on the surface and a three-dimensional mark molded into the part have different requirements. The latter is formed by the corresponding geometry in the mold. Printing plates and hot stamping dies serve a different purpose from injection molds.
A cap may also be an assembly of several parts. When changing its outer shape, establish whether the change is limited to the exterior or also affects closure, connections, or internal fit. Which parts can be retained must be checked against the actual assembly. A change that appears to affect only the cap does not establish that every other part will be unaffected.
To complete the appearance design, view the selected body, cap, finish, and graphics together on a sample. Check whether the transparent areas reveal the intended parts, whether the glossy and matte finishes work together, and whether the text is clear against the actual base color. Color swatches and individual decoration samples help define one effect at a time; a complete sample shows how those choices look together on the finished package.