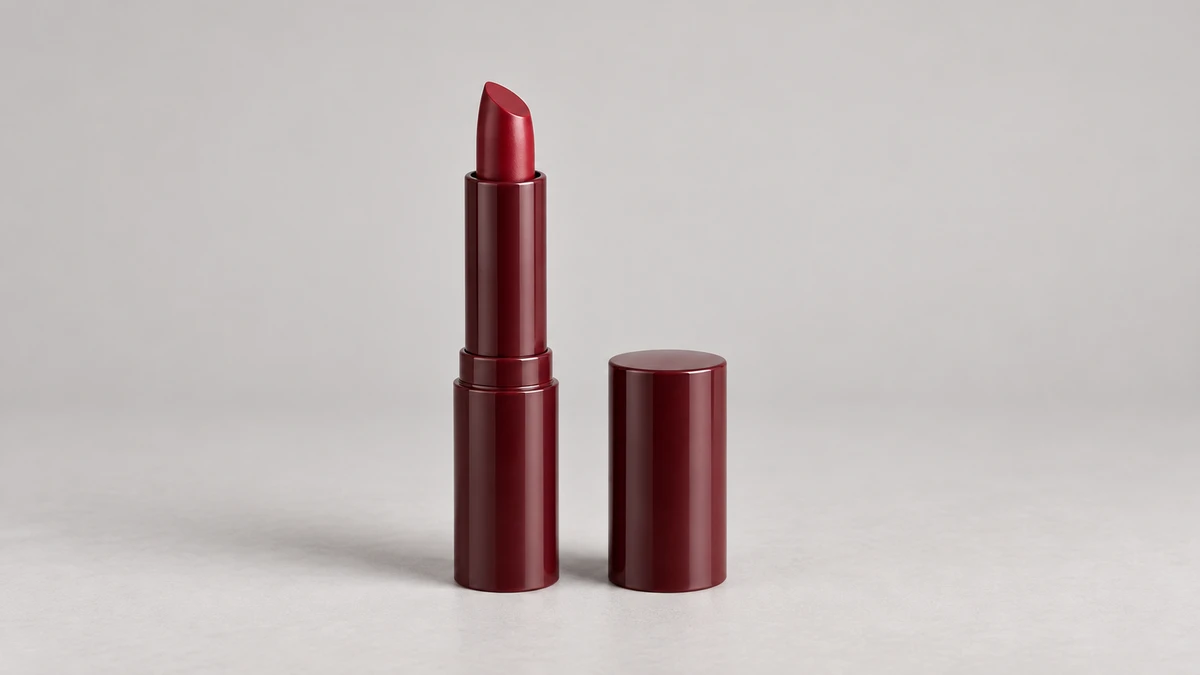
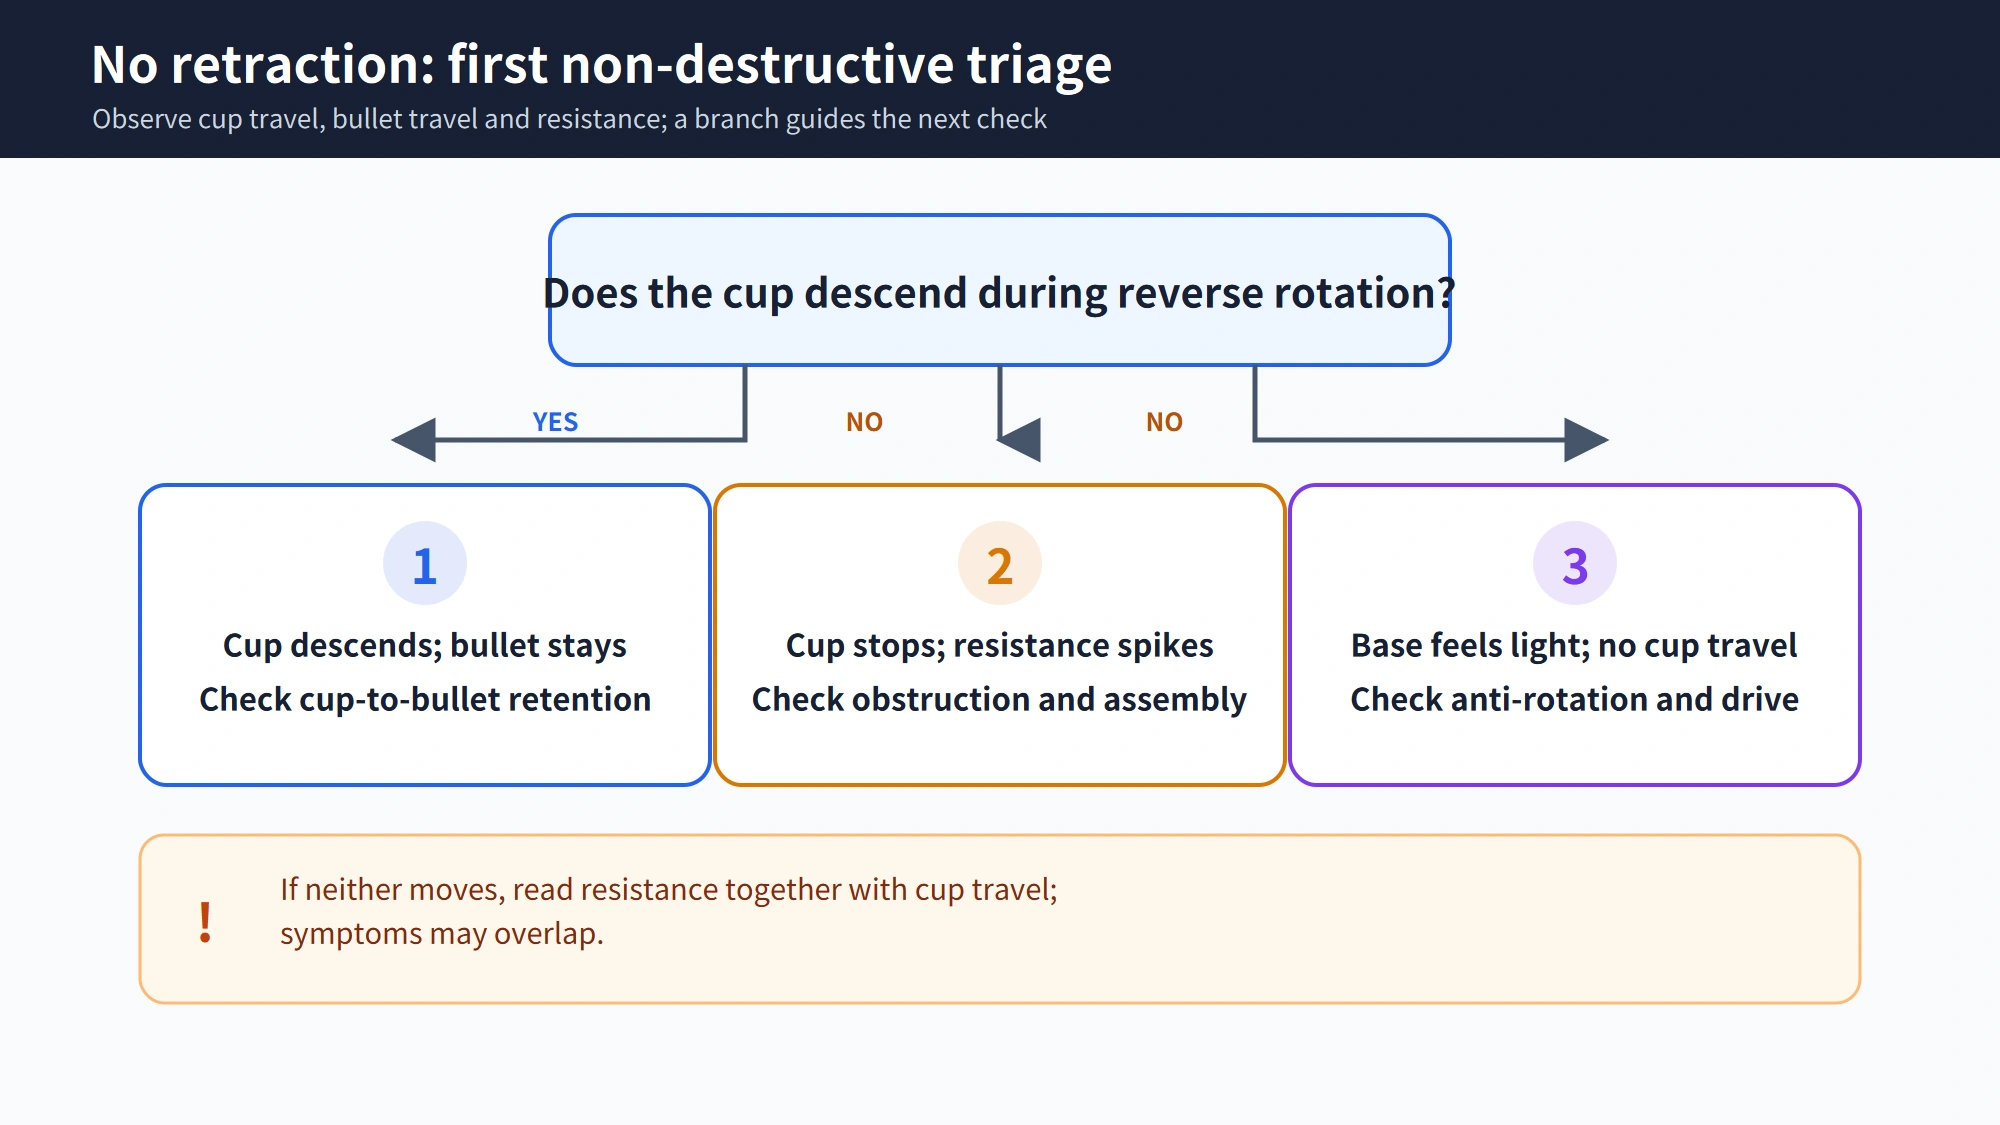
A lipstick tube can extend, but it will not retract. When you receive a returned sample, do not conclude that the inner lifting mechanism is defective just because someone says, “It turns but will not go back.” Check two things first: when the base is turned in the reverse direction, does the cup that supports the bullet move down, and does the lipstick move with it? If the cup goes down but the bullet stays in place, start with the cup-to-bullet connection. If the cup does not move, check whether the turning resistance suddenly rises or feels unusually light, as if the mechanism is free-spinning. These observations only tell you whether to examine the cup, the mechanism, or the assembly interface; they do not assign responsibility.
Keep the failed sample in its original filled condition. Give the original failed sample, an empty shell from the same batch, and a filled retain sample from the same batch separate IDs. Photograph the bullet exposure and cup opening and, without forcing the mechanism, record the first extension and retraction: cup and bullet movement, the position where it stops, and the hand feel. Record any known temperature exposure, drops, or use history under the same ID. Preserve the IDs, photos, video, and use history before comparison testing. Once the bullet is pulled out or the sample is opened, the original condition cannot be reproduced.
Start by classifying the Symptom
Write “rises but will not retract” as a reproducible observation. At minimum, record the sample and batch IDs, whether the sample is empty or filled, the travel position where the abnormality starts, and whether the cup and bullet each move during reverse rotation. Record resistance as continuously light, suddenly tight at a certain point, or close to the normal retain sample. If test equipment is available, add a torque–angle curve. Always record the rotation direction so that smooth extension is not mistaken for acceptable retraction.
If the cup moves down while the bullet stays in place, move to “What to check on the cup.” If the cup does not move and a clear tight spot appears, check the mechanism and assembly interference before comparing empty and filled samples. If the base turns very lightly but the cup has no axial movement, check the base anti-rotation feature and the internal transmission. If neither the cup nor the bullet moves, bullet position alone cannot distinguish a jam from free-spinning; resistance and cup movement must be read together. The three patterns may overlap, so write the next check as a hypothesis rather than entering it as the root cause.
How the Mechanism Transmits Force
Why can the cup move up and down? As the base turns, relative movement between the helical groove and the guide lugs on the cup converts rotation into axial movement. The fork limits cup rotation and allows the cup to travel linearly. The exact part shapes and anti-rotation locations vary between lipstick mechanisms, but every investigation must ask whether rotational input reaches the cup and whether the moving cup carries the bullet with it. Retraction requires the same transmission path to remain engaged; successful extension is not proof that retraction will work.
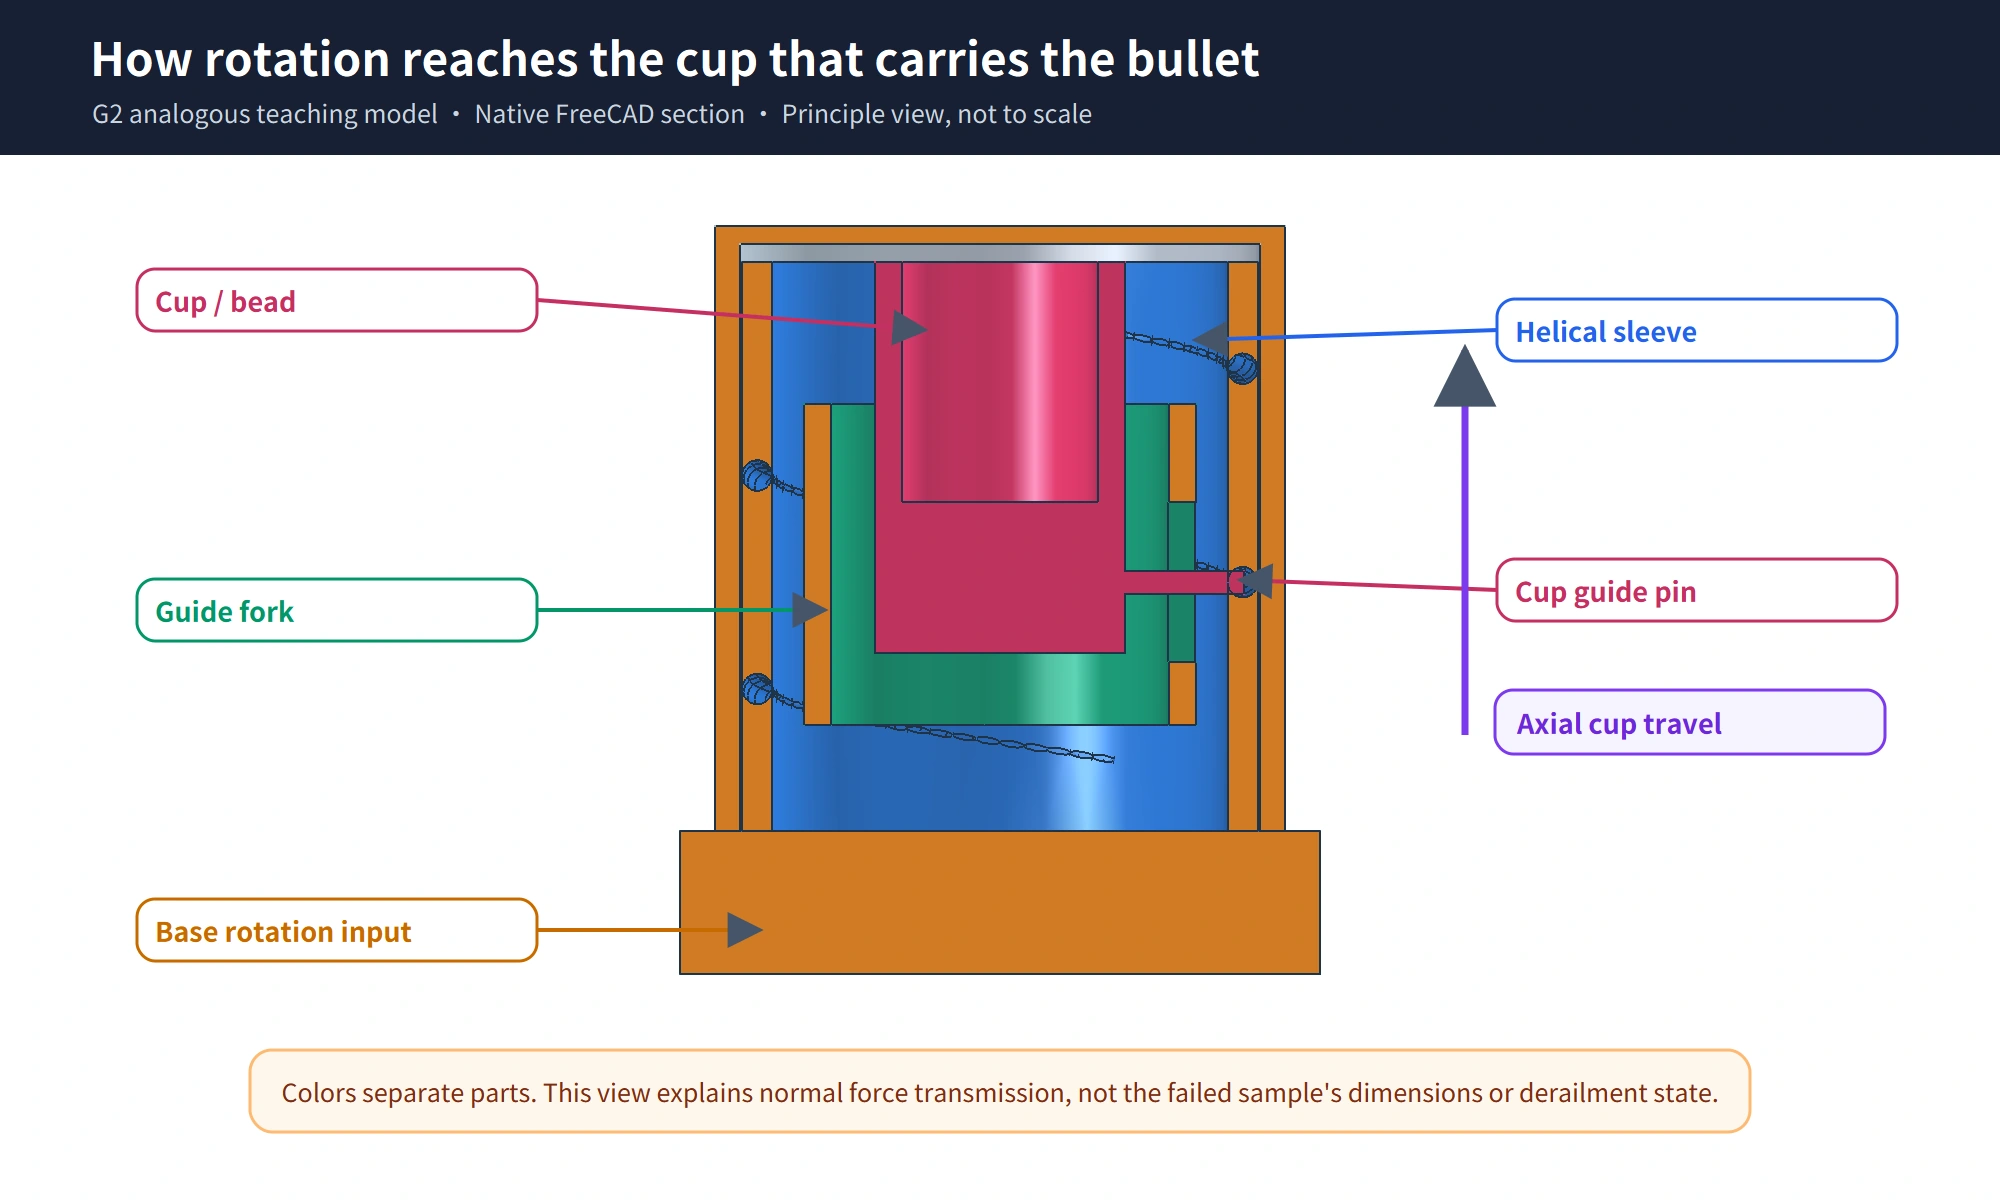
When checking the lipstick tube shell and base assembly interfaces covered by Sambound, record “the base is turning” separately from “the cup is moving down.” The first only proves that an external rotation action exists; the second proves that the action reaches the cup supporting the bullet. Once these are separate observations, you can decide whether to request groove, lug, and travel records from the mechanism supplier or first check shell anti-rotation, press-fit deformation, and assembly condition. Do not assign the failure to one part simply because the base, cup, and mechanism are in the same lipstick tube.
What to Check First When the Cup Retracts
If the cup retracts but the bullet does not, start with what can be seen externally after the two have separated. Photograph any bullet residue visible at the cup opening and any clear fracture surface at the bullet root, while keeping the exposure height recorded. A broken root and a bullet that has slipped out of the cup lead to different checks, but residue location is only a clue. Without a retention or shear test, one fracture photo cannot establish whether the formula, cup ribs, or filling process is responsible.
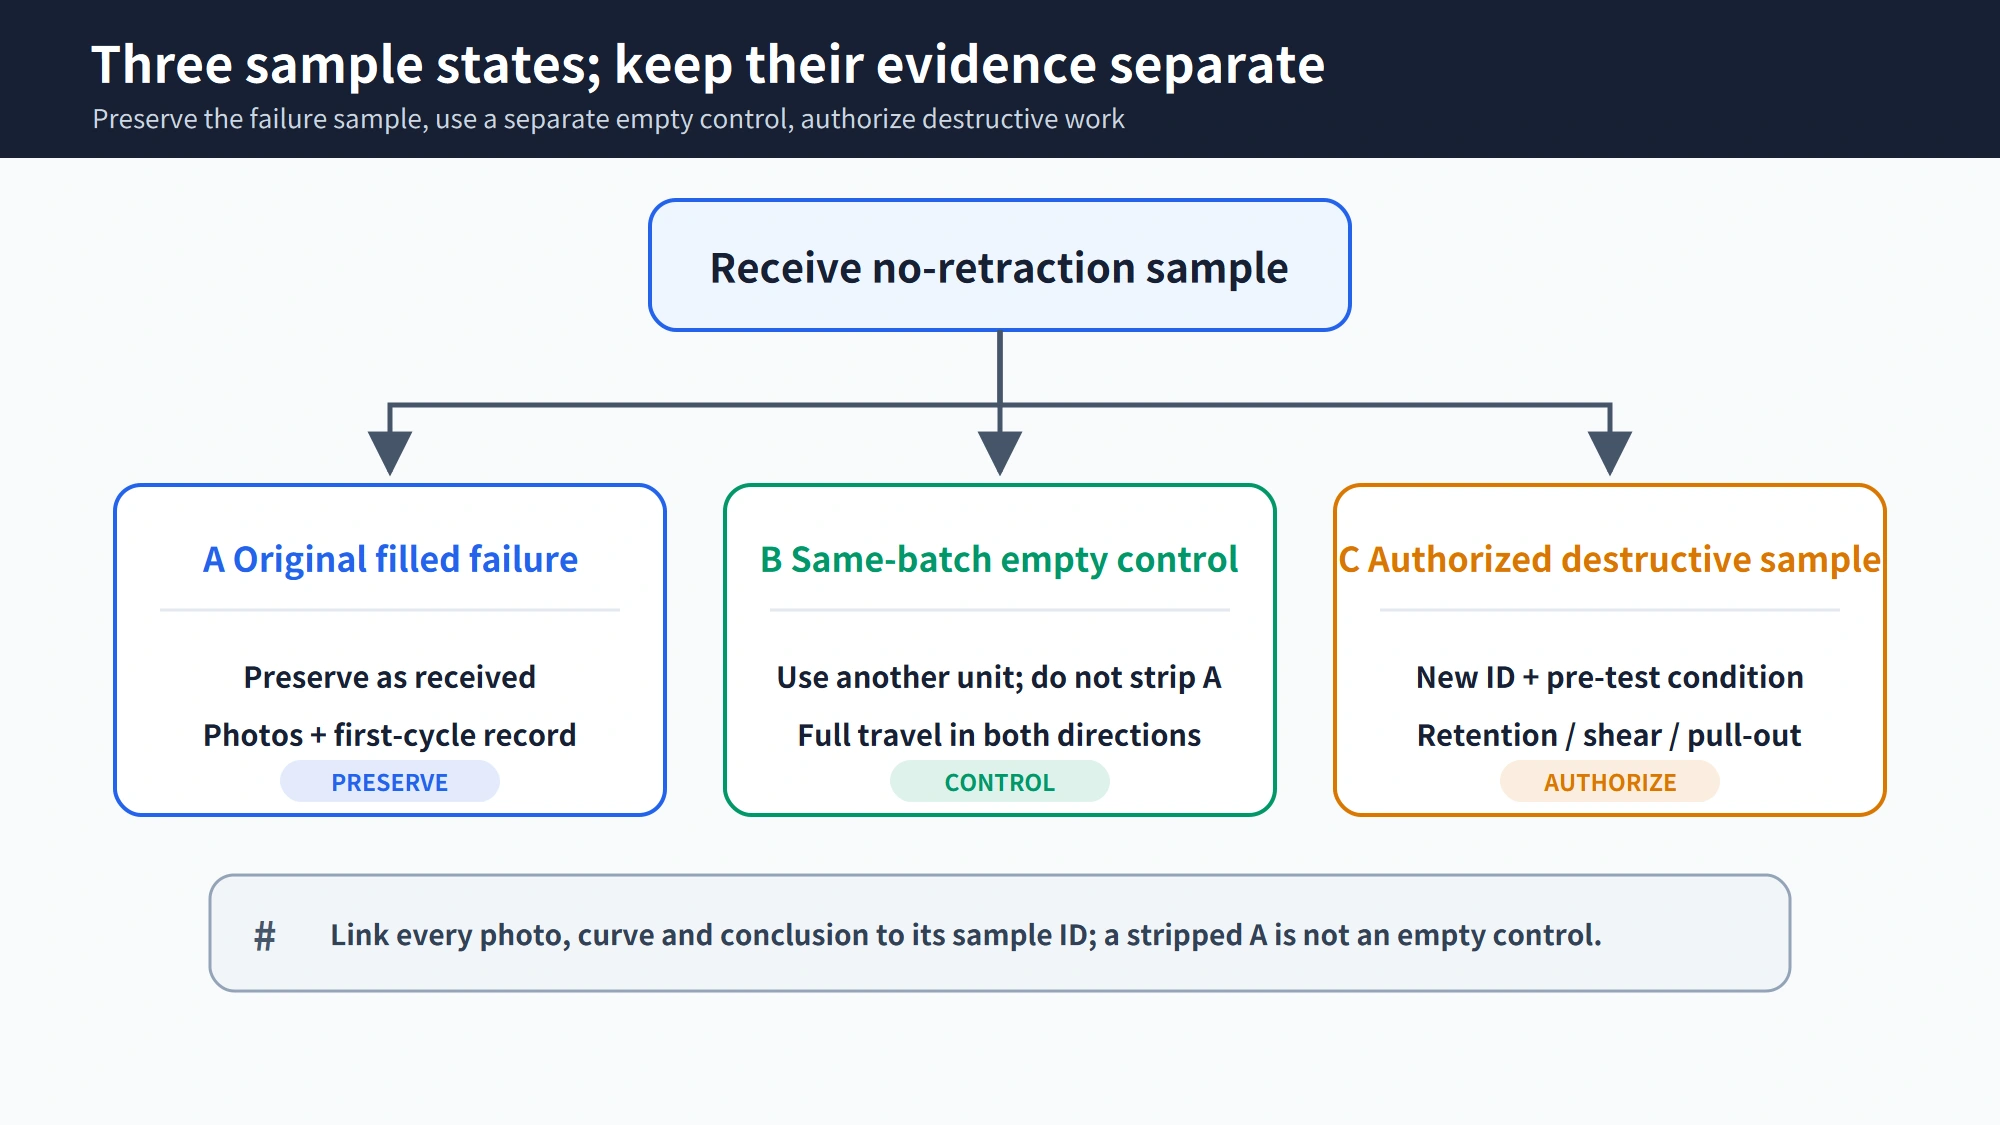
Keep three sample conditions separate. First, use the original filled failed sample only for non-destructive observation and reproducible turning records; mark the abnormal position and do not pull the bullet. Second, use a separate empty shell from the same batch to confirm whether the mechanism completes extension and retraction; do not turn the original failed sample into an empty shell and treat that as the control. Third, if the cup-to-bullet connection must be examined, obtain authorization for disassembly or destructive testing, record a new sample ID and the pre-test condition, and then arrange retention, shear, or pull-out checks. Link every photo and result back to the sample ID so the condition that produced the evidence is clear.
Check the cup inner diameter, depth, rib geometry, and support height together with the bullet diameter and post-filling condition. A loose connection can let the bullet slip out. If the cup ribs are too tight, first check bullet deformation and root integrity. Only when the cup or bullet contacts the outer shell, the cup deforms, or an assembly interference is found should you continue to test whether that contact, deformation, or interference affects lifting. If the same-batch empty shell works normally but the cup-to-bullet retention test is abnormal, request the relevant dimensions and test records from the cup design, filling, and finished-product validation teams, then compare them with the approved specification for this product.
Why the Helix May Free-Spin
If turning feels very light but the cup does not move, rotation is not producing the expected axial travel. First check whether the base and mechanism turn together and whether the outer shell anti-rotation feature is effective. Then use an empty shell from the same batch for a full extension and retraction comparison. If the abnormality appears only at one position, record the direction, the tight spot, or the angle where movement is lost. If it appears only at the top end, record what happened immediately before and after the end stop. Do not keep forcing the original failed sample to reproduce the problem.
US5813421A describes a specific early mechanism in its background section: torque beyond the design condition at the end of travel can deform the lower engagement. The guide lugs can then leave the helical groove while the mechanism keeps turning and the cup stops moving, creating free-spinning. This explains one possible path for “free-spinning after reaching the top,” but it does not prove that the sample in your hands has undergone the same disengagement. Base anti-rotation failure, groove or lug damage, debris, and assembly misalignment must also be checked. To identify the failed interface in the current sample, match the torque curve and cup movement record with authorized disassembly photos.
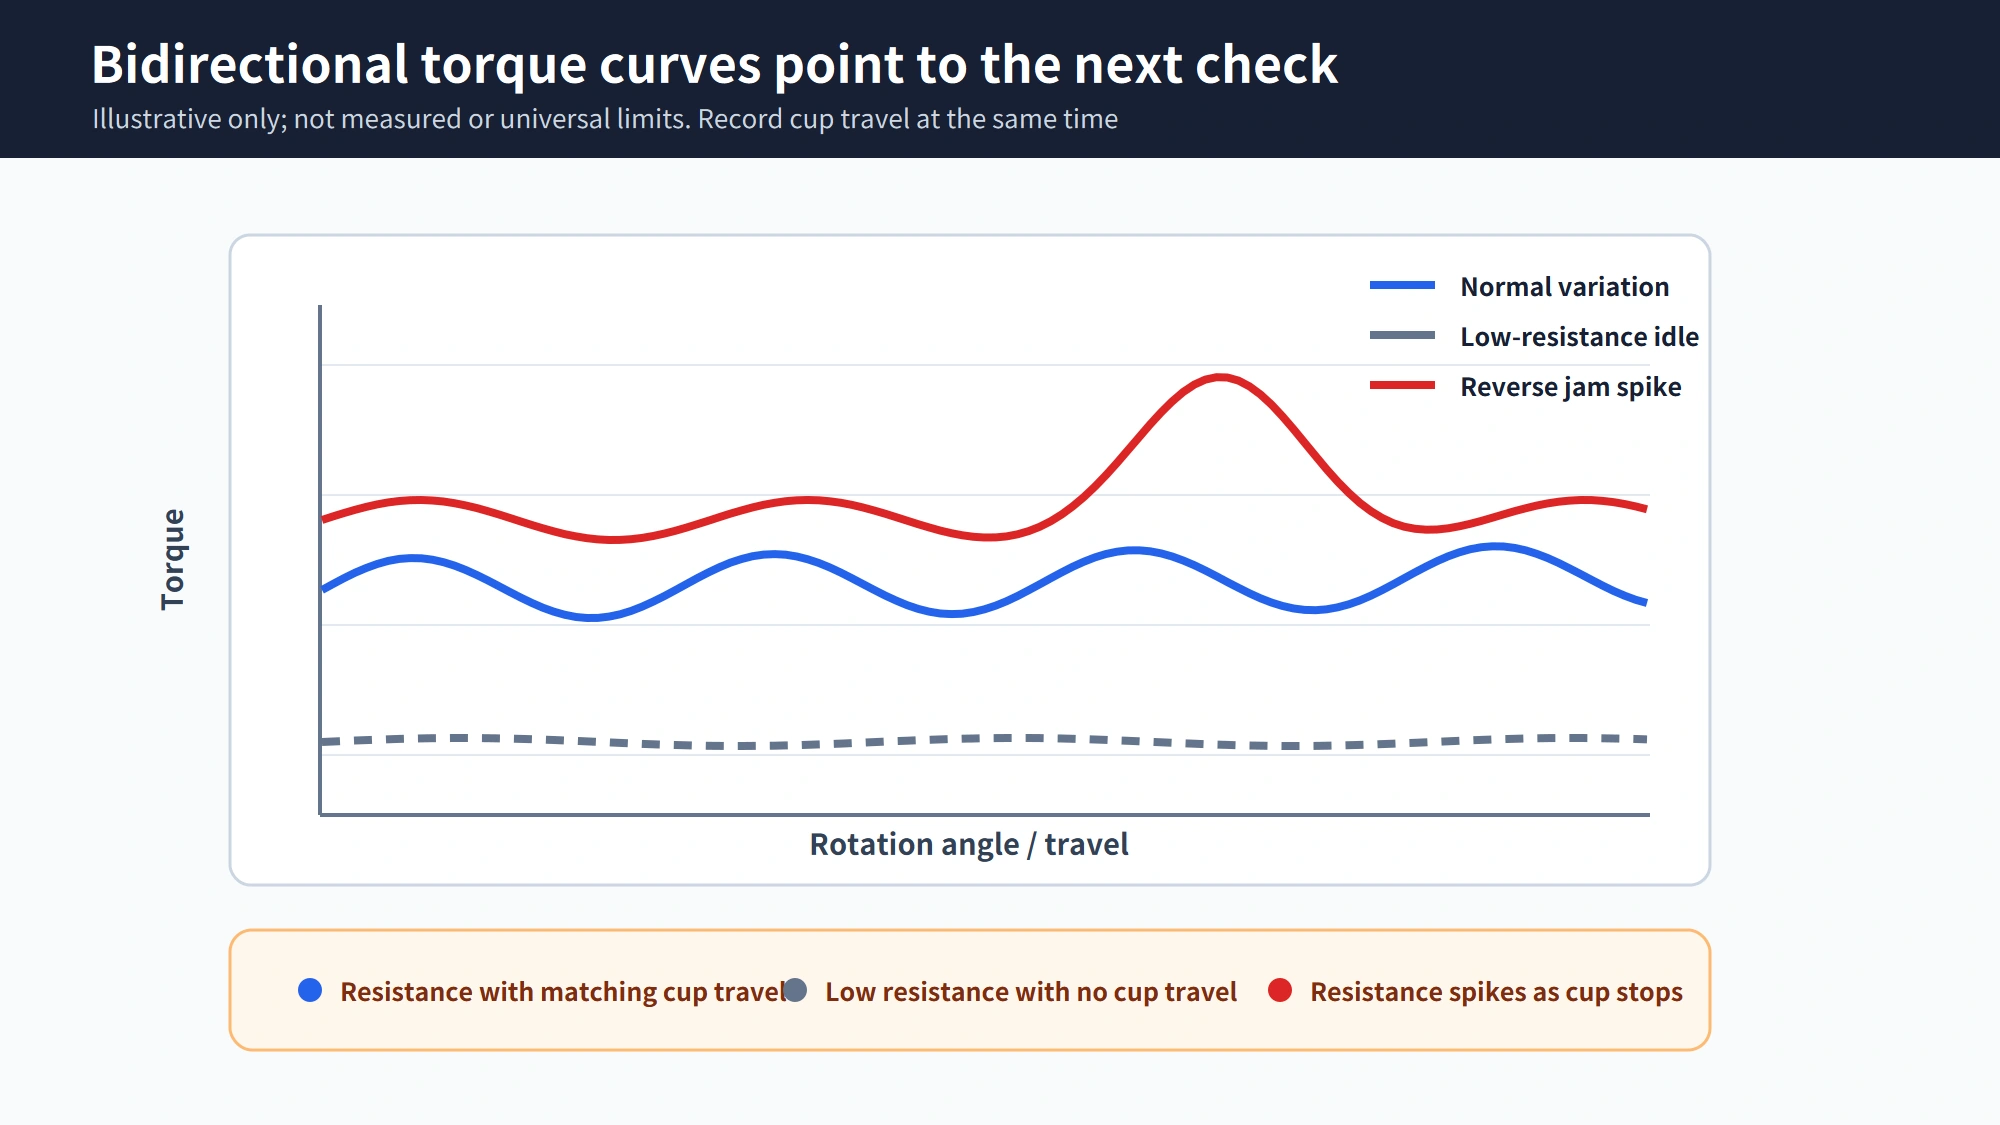
For testing, plot extension and retraction separately as torque versus rotation angle and record cup movement at the same time. If torque is low over a section while the cup does not move, check whether transmission has been interrupted. If reverse torque rises sharply at a point and the cup stops retracting, check that position for interference or a jam. Curve shape only tells you where to look first; one curve cannot prove that a guide lug left the groove or assign supplier responsibility. Keep fixture settings, speed, start and end positions, and test direction with the corresponding curve so same-batch samples can be compared.
Why a Filled Tube Behaves Differently
If the same-batch empty shell moves smoothly in both directions but the filled sample jams during retraction, stop treating the mechanism as the only lead and check the additional load and contact introduced by the bullet. Record the filled sample weight, diameter, hardness or formula code, and its condition after filling and cooling. Bullet eccentricity, local contact, and assembly compression can be listed as hypotheses to verify. The available evidence does not prove one-sided contact in this product, and “it jams only when filled” is not enough to establish that mechanical path.
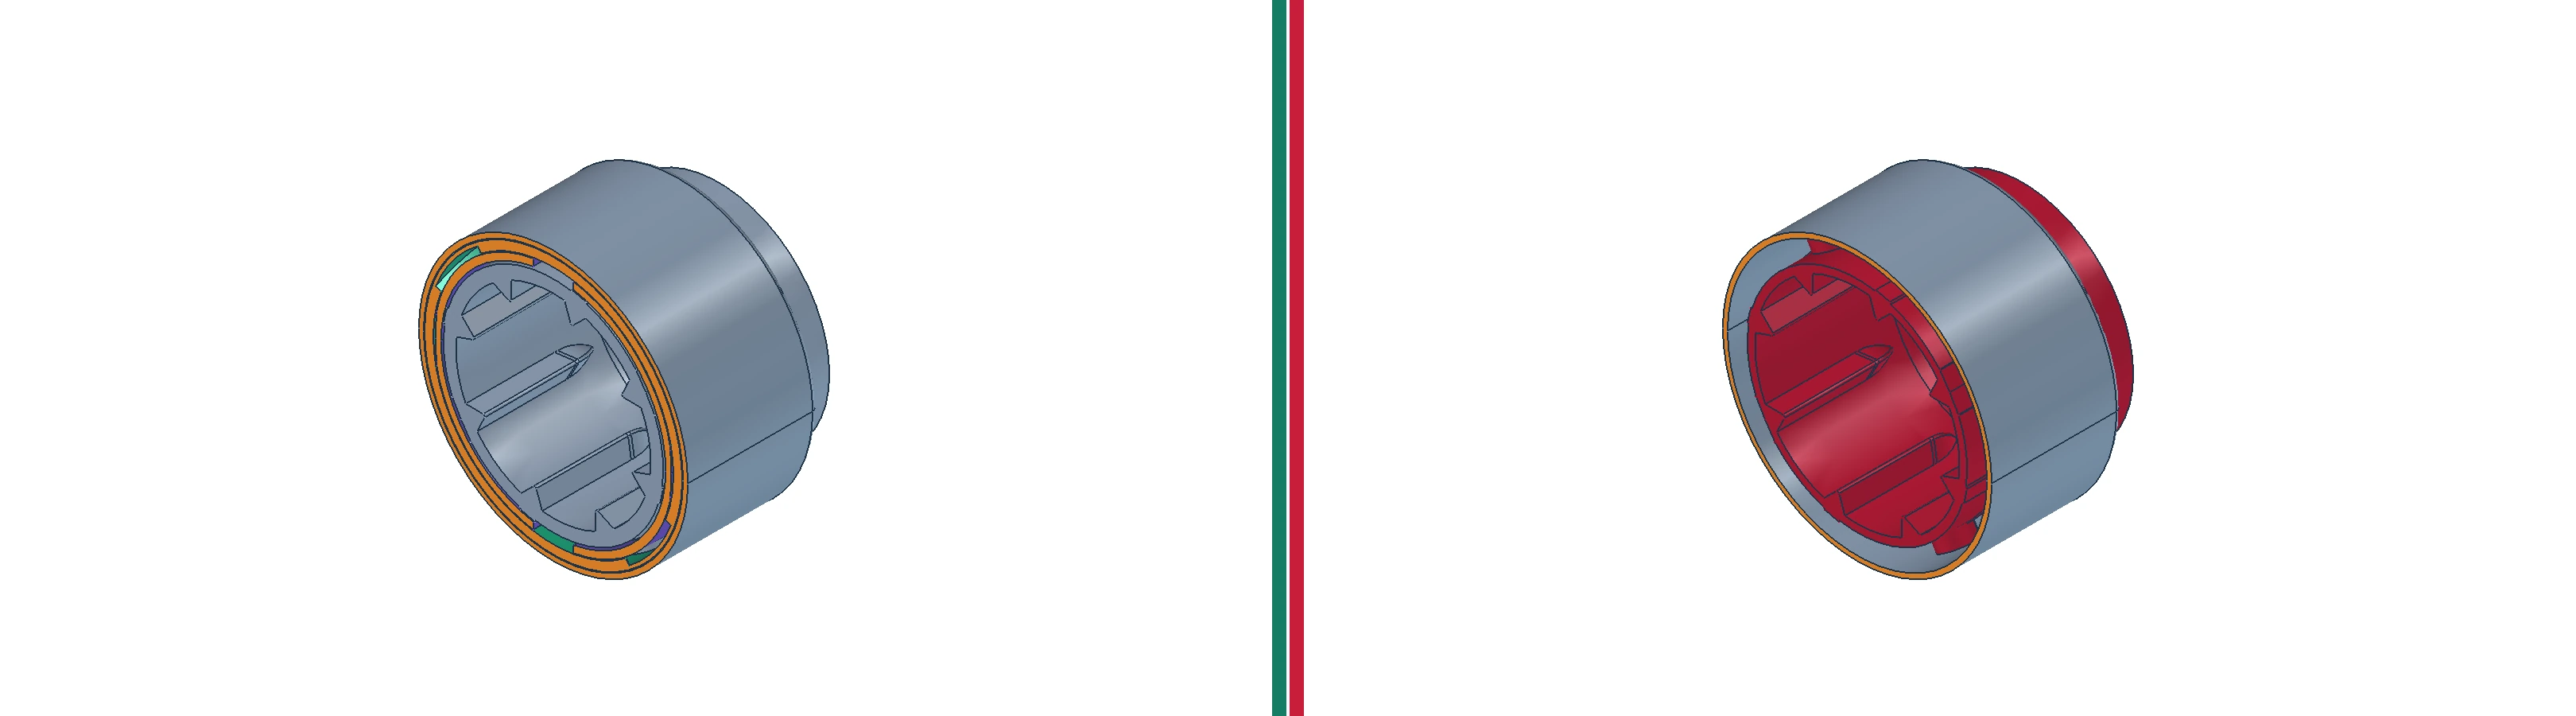
Number the same-batch empty shell and the production-condition-filled sample separately. Test them with the same fixture, speed, extension, and retraction travel. Keep complete bidirectional torque curves, cup stop position, retraction depth, and repeatability for both conditions. If the abnormality appears only in the filled sample, first check whether it always jams at the same travel position, then compare bullet dimensions and condition, cup retention, and shell assembly dimensions together. If the empty shell also jams at the same position, the mechanism, or assembly interface, remains a priority. There is no public universal pass range for the torque difference between empty and filled samples; use the approved specification for this product and the same-batch control instead of borrowing a fixed number from another project.
What to Keep in the Acceptance Record
At the end of the investigation, one sample ID should connect what was observed, which test was performed, and who owns the next check. In shell and base assembly and finished-product function checks, Sambound recommends keeping the pre- and post-assembly condition linked to the sample ID. Otherwise, even if the mechanism supplier provides a curve, you cannot tell whether it belongs to a supplied component, an assembled empty shell, or a filled finished product.
| Record owner | Materials to verify under the sample ID, and ID | Question to answer |
|---|---|---|
| Mechanism supplier | Batch and version, key mating dimensions, full extension and retraction curves, and end-stop records | Does the mechanism transmit normally in both directions for the relevant batch? |
| Shell and assembly team: team | Base anti-rotation, press-fit and wobble condition, stop position, and pre-/post-assembly photos or measurements | Did the shell or assembly interface change the mechanism movement? |
| Filling and finished-product validation team | Filled sample weight, diameter, hardness or formula code, cooling condition, bidirectional curves, and authorized retention-test records | Does the abnormality appear only in the filled condition, and can the cup retain the bullet? |
Every test record should also state the test date, sample condition, fixture, speed, rotation direction, and travel. Pay special attention to lateral force introduced by the fixture during low-torque testing; otherwise, a clamping error may be mistaken for product jamming. Acceptance should be judged only against the approved, versioned specification and its test conditions. If that document is unavailable, report the reproducible difference and the missing evidence first. When a similar “rise but will not retract” return arrives, repeat the same ID and condition records so the next comparison can show exactly where the failure occurs.